Nail Technology Program
Manicure
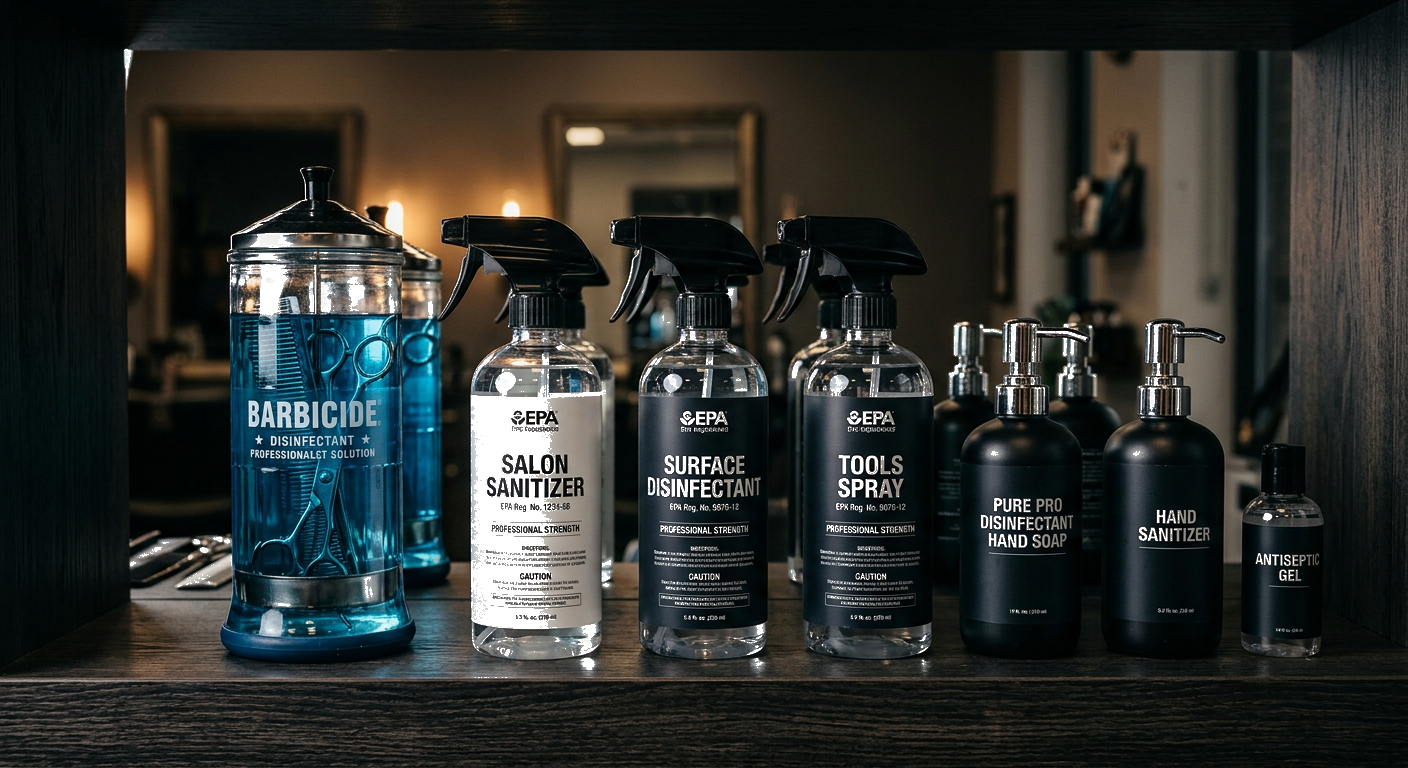
Basic & Spa — Station Setup & Supplies
Side A — Equipment & Supplies
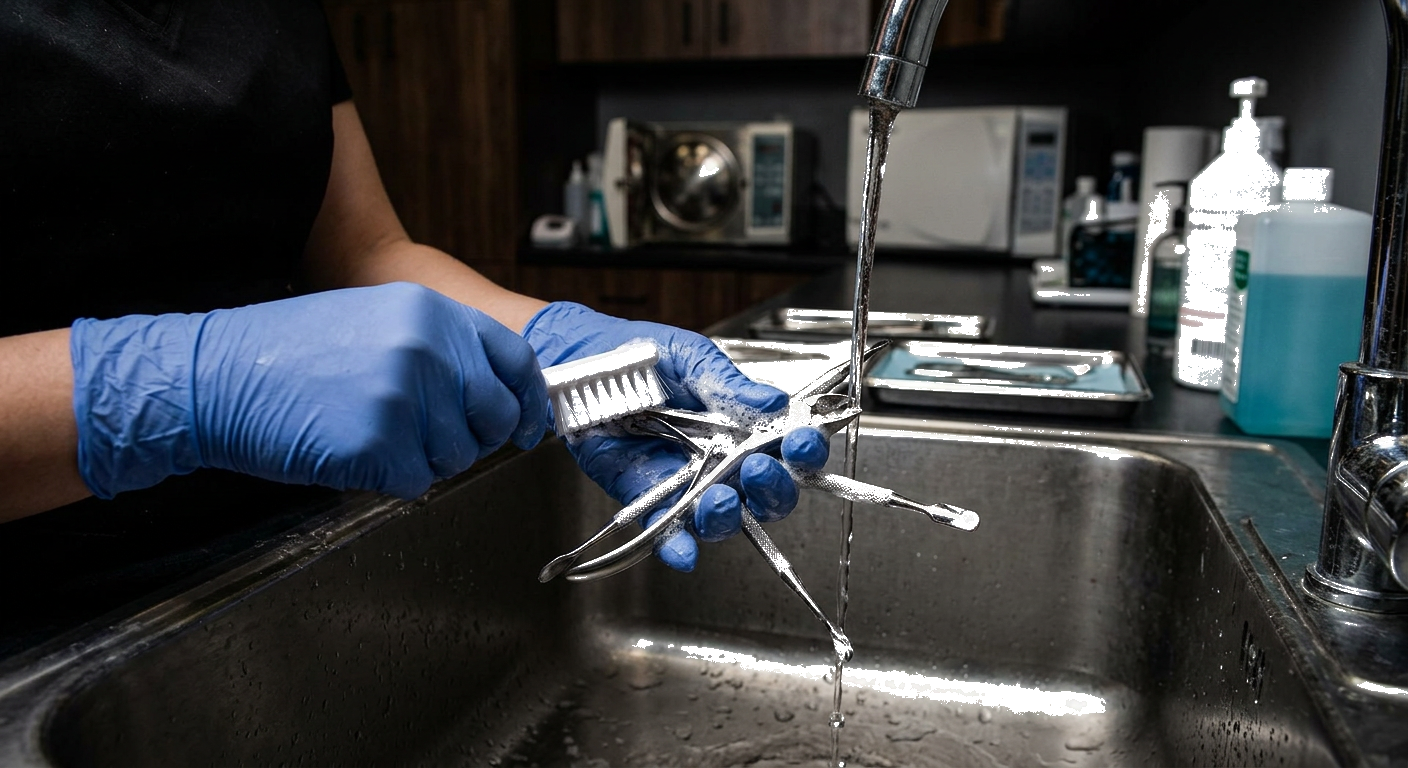
Multiuse Implements — Disinfected
- Finger bowl
- Manicure table
- Cuticle pusher (metal)
- Cuticle nipper
- Nail brush
- Orangewood stick
- Table lamp
- Covered waste bin
Single-Use / Disposable
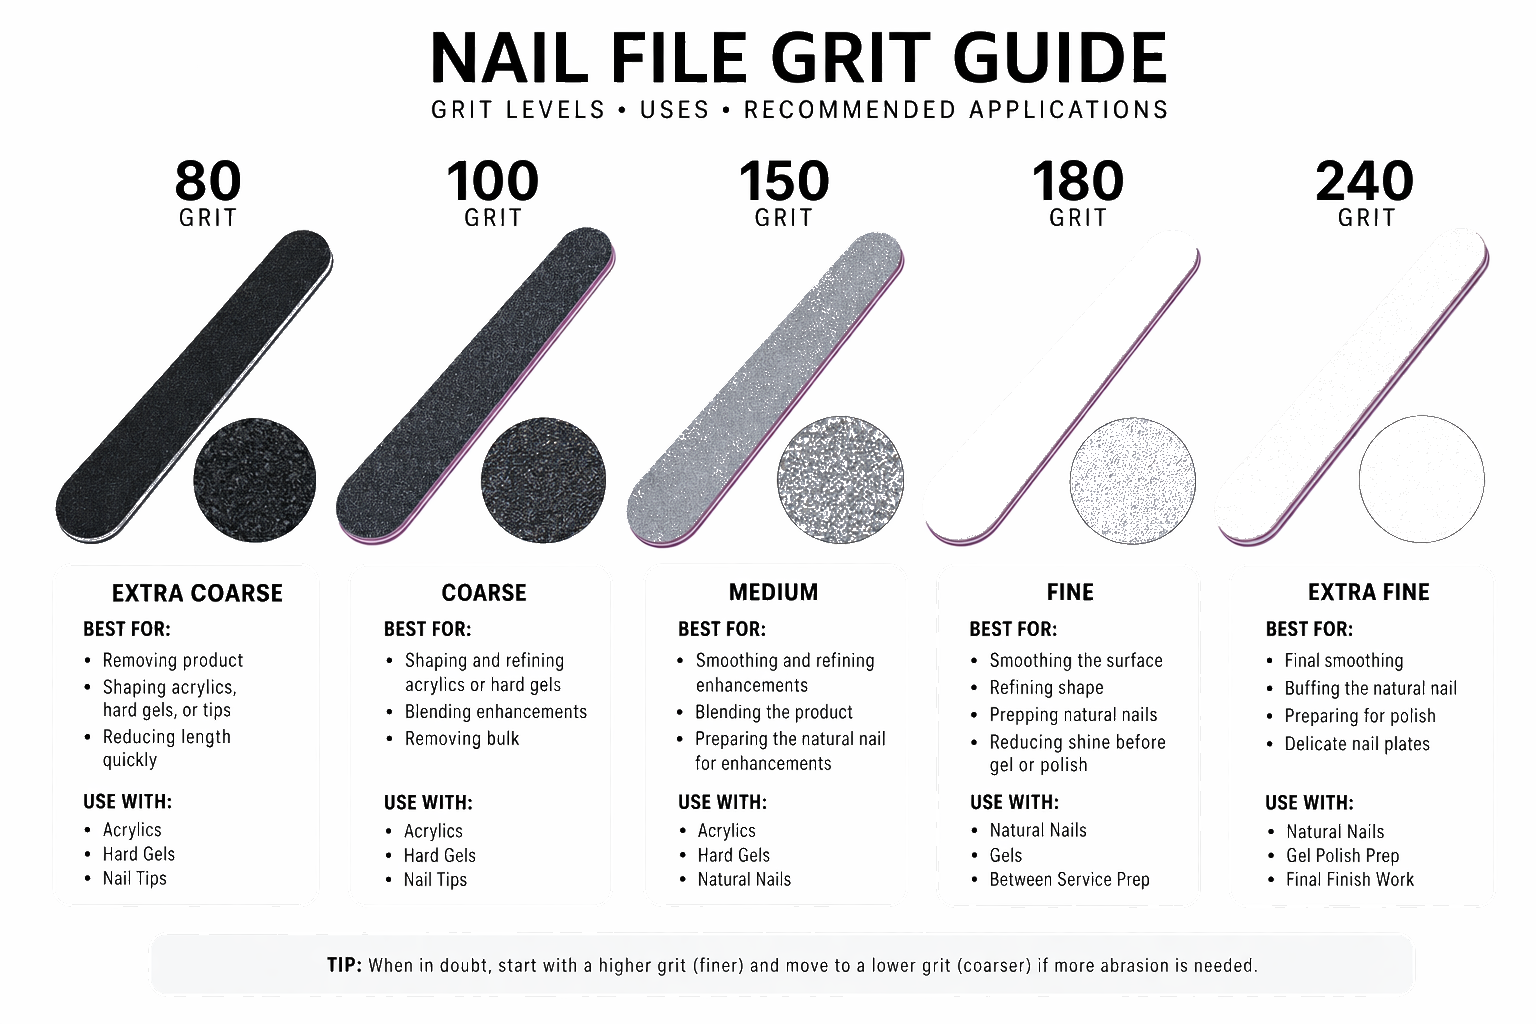
- Nail files — 180 & 240 grit
- Buffer block — 220 grit
- Lint-free wipes
- Cotton balls / rounds
- Disposable towels
- Gloves (latex-free)
- Plastic bag basin liner
- Toe separators
Products on Cart
- Polish remover (acetone & non-acetone)
- Cuticle softener
- Hand soak / antibacterial soap
- Cuticle oil
- Hand lotion / cream
- Base coat
- Top coat
- Client color selection
Safety: Verify no open cuts, wounds, or contraindications (fungal infection, warts, severe inflammation). Never cut live tissue. Do not share files or buffers between clients. Gloves required if any skin integrity concern.
© 2026 Shear Genius Society, LTD Co. — All Rights Reserved. Unauthorized reproduction prohibited.
↔ flip for back
Nail Technology Program
Manicure
Step-by-Step Service Protocol
Side B — Service Steps
Pre-Service
- Wash & sanitize hands; set up fully disinfected station.
- Greet client; complete intake / consultation card.
- Have client wash hands at sink with antibacterial soap.
Service Steps
- Remove existing polish with lint-free wipe & remover.
- File nails to desired shape — stroke in one direction only.
- Buff surface lightly if needed to smooth ridges.
- Soak fingers in warm soapy water 3–5 minutes.
- Dry hands thoroughly; apply cuticle softener.
- Push back cuticles gently with orangewood stick.
- Nip loose / dead cuticle only — never live tissue.
- Remove debris; re-dry hands completely.
- Massage hands and lower arm with lotion.
- Wipe nails clean of all oils with lint-free wipe.
- Apply base coat → 2 color coats → top coat; cap the free edge each time.
- Clean up edges; apply cuticle oil to finish.
Post-Service
- Advise drying time; provide homecare recommendations.
- Discard ALL single-use items immediately into lined bin.
- Clean, wash, and fully disinfect all multiuse implements.
- Sanitize table surface; reset station for next client.
© 2026 Shear Genius Society, LTD Co. — All Rights Reserved. Unauthorized reproduction prohibited.
Nail Technology Program
Pedicure
Basic & Spa — Station Setup & Supplies
Side A — Equipment & Supplies
Multiuse Implements — Disinfected
- Pedicure basin / spa chair
- Foot brush
- Cuticle pusher (metal)
- Cuticle nipper
- Metal nail file / rasp
- Callus paddle / grater
- Toenail clippers
- Orangewood stick
Single-Use / Disposable
- Pedi liner (basin) — mandatory
- Foot files / paddles
- Toe separators
- Disposable slippers
- Lint-free wipes
- Gloves (latex-free)
- Plastic bag liners
- Disposable towels
Products on Cart
- Polish remover
- Foot soak / bath salts
- Cuticle softener
- Exfoliant / scrub
- Callus softener
- Foot lotion / mask
- Cuticle oil
- Base coat & top coat
Safety: Inspect feet for cuts, sores, fungal infection, or diabetic concerns before service. Do NOT perform on open wounds or active infection. Drain, flush, and disinfect basin per state board standards after EVERY client — no exceptions.
© 2026 Shear Genius Society, LTD Co. — All Rights Reserved. Unauthorized reproduction prohibited.
↔ flip for back
Nail Technology Program
Pedicure
Step-by-Step Service Protocol
Side B — Service Steps
Pre-Service
- Sanitize hands; set up disinfected station with lined basin.
- Complete client consultation; inspect feet for contraindications.
- Fill basin with warm water and foot soak solution.
Service Steps
- Remove existing polish with remover and lint-free wipe.
- Cut toenails straight across; file smooth — never round corners.
- Soak feet 5–10 minutes in prepared basin.
- Apply exfoliating scrub; massage lower leg and foot.
- Work callused areas with foot file or paddle.
- Apply callus softener if needed; allow to penetrate.
- Push back cuticles; nip only loose or dead tissue.
- Rinse feet with clean warm water; dry completely including between toes.
- Apply mask or paraffin if included in service menu.
- Massage foot and calf with lotion.
- Place toe separators; wipe nails free of all oils.
- Apply base coat → 2 color coats → top coat.
Post-Service
- Allow drying time; provide homecare advice.
- Drain basin; disinfect per state board protocol; rinse thoroughly.
- Discard all single-use items; disinfect all multiuse implements.
- Reset station completely for next client.
© 2026 Shear Genius Society, LTD Co. — All Rights Reserved. Unauthorized reproduction prohibited.
Nail Technology Program
Acrylic Nails
Full Set & Fill — Station Setup & Supplies
Side A — Equipment & Supplies
Multiuse Implements — Disinfected
- Acrylic nail brush
- Dappen dish
- Cuticle pusher (metal)
- Cuticle nipper
- Nail drill & bits (cleaned)
- Pinching tool / C-curve clamp
- Orangewood stick
- Fan brush
Single-Use / Disposable
- Nail tips (assorted sizes)
- Nail forms
- Nail files — 100 & 180 grit
- Buffer block — 220 grit
- Lint-free wipes
- Gloves (latex-free)
- Tip cutter / clipper
- Finger cots
Products on Cart
- Acrylic powder — clear, pink, white
- Acrylic liquid (monomer)
- Nail dehydrator
- Nail primer (acid-free or acid)
- Tip adhesive / nail glue
- Cuticle oil
- Top coat / gel gloss
- Isopropyl alcohol 99%

Safety: Ventilated area REQUIRED — monomer fumes are hazardous. Monomer is flammable — no open flames nearby. Wear gloves and mask. Do NOT apply over damaged nail plate, infections, or open skin. Screen for methacrylate allergies before service.
© 2026 Shear Genius Society, LTD Co. — All Rights Reserved. Unauthorized reproduction prohibited.
↔ flip for back
Nail Technology Program
Acrylic Nails
Full Set & Fill — Service Protocol
Side B — Service Steps
Pre-Service
- Sanitize hands; set up disinfected station; ensure ventilation.
- Consult client on shape, length, and design preferences.
- Check for contraindications; patch test if new client.
Service Steps
- Remove all existing product or polish completely.
- Push back cuticles; lightly buff natural nail to remove shine.
- Cleanse nail plate with dehydrator; allow to fully dry — do not touch.
- Apply primer sparingly to natural nail only — keep off skin and cuticle.
- Select correct tip size; apply with adhesive; blend seam flush with file.
- Cut tips to desired length with tip cutter.
- Apply acrylic product using bead technique — Zone 1 (stress area), Zone 2 (middle), Zone 3 (cuticle).
- Shape product while pliable; pinch for C-curve at 2–3 minutes if desired.
- Allow full cure; file and shape enhancement to final form.
- Buff smooth; remove all dust with fan brush.
- Apply top coat or gel gloss; cure if using gel top.
- Apply cuticle oil; massage hands.
Post-Service & Fill Protocol
- Educate client on fill schedule (every 2–3 weeks) and nail care.
- Fills: back-fill regrowth area; blend seam; rebalance apex and C-curve.
- Discard all disposables; clean and disinfect all tools; ventilate area.
© 2026 Shear Genius Society, LTD Co. — All Rights Reserved. Unauthorized reproduction prohibited.
Nail Technology Program
Gel Nails
Hard Gel / Builder Gel — Station Setup & Supplies
Side A — Equipment & Supplies
Multiuse Implements — Disinfected
- LED / UV lamp (interior cleaned)
- Gel brush set
- Cuticle pusher (metal)
- Cuticle nipper
- E-file & bits (cleaned)
- Orangewood stick
- Pinching tool / clamp
- Fan brush
Single-Use / Disposable
- Nail forms
- Nail tips (assorted)
- Files — 100 & 180 grit
- Buffer blocks
- Lint-free wipes
- Gloves
- Tip cutter / clipper
- Aluminum foil strips
Products on Cart
- Nail dehydrator
- pH bond / primer
- Base gel
- Builder / hard gel
- Color gel (selection)
- No-wipe top gel
- Gel cleanser / IPA 99%
- Cuticle oil

Safety: Never look directly into UV/LED lamp; warn photosensitive clients. Screen for gel / HEMA allergy. Avoid flooding cuticle — inhibits cure and causes lifting. Fully cure EVERY layer before applying next. Check lamp wattage matches product brand.
© 2026 Shear Genius Society, LTD Co. — All Rights Reserved. Unauthorized reproduction prohibited.
↔ flip for back
Nail Technology Program
Gel Nails
Hard Gel / Builder Gel — Service Protocol
Side B — Service Steps
Pre-Service
- Sanitize hands; prepare disinfected station and lamp.
- Consult client on structure, shape, and color goals.
- Confirm no contraindications or prior gel reactions.
Service Steps
- Remove all existing product; push back and clean cuticles.
- Lightly buff nail plate to remove shine.
- Cleanse with dehydrator; apply pH bond or primer; allow to dry fully.
- Apply thin base gel layer; cap the free edge; cure fully.
- Build structure with builder gel — bead and brush method.
- Pinch at 2–3 minutes for C-curve while product is still pliable.
- Cure each layer fully per manufacturer's recommended time.
- File and shape enhancement to desired length and form.
- Buff smooth; remove all dust with clean brush.
- Apply color gel in thin coats — cure fully between every coat.
- Apply no-wipe top gel; cure. Cleanse inhibition layer if needed.
- Apply cuticle oil; massage into nails and surrounding skin.
Post-Service
- Advise fills every 2–3 weeks; explain soak-off removal process.
- Clean gel brushes with cleanser; cap tightly.
- Discard single-use items; disinfect all multiuse tools; wipe lamp.
© 2026 Shear Genius Society, LTD Co. — All Rights Reserved. Unauthorized reproduction prohibited.
Nail Technology Program
Gel Polish
Soak-Off Gel — Station Setup & Supplies
Side A — Equipment & Supplies
Multiuse Implements — Disinfected
- LED / UV lamp (interior clean)
- Cuticle pusher (metal)
- Cuticle nipper
- Orangewood stick
- E-file (optional)
- Gel brush set
Single-Use / Disposable
- Nail files — 180 & 240 grit
- Buffer block — 220 grit
- Lint-free wipes
- Gloves (latex-free)
- Foil wraps or nail clips
- Cotton balls / rounds
- Toe separators
- Disposable towels
Products on Cart
- Nail dehydrator
- Gel base coat
- Gel polish color selection
- Gel top coat (no-wipe preferred)
- Pure acetone (removal)
- Gel cleanser / IPA 99%
- Cuticle oil
- Hand lotion
Safety: Keep acetone away from open flames — highly flammable. Ensure full cure between every layer. Educate clients: never peel gel — causes nail plate damage. Check lamp wattage compatibility with brand being used.
© 2026 Shear Genius Society, LTD Co. — All Rights Reserved. Unauthorized reproduction prohibited.
↔ flip for back
Nail Technology Program
Gel Polish
Application & Removal — Service Protocol
Side B — Service Steps
Pre-Service
- Sanitize hands; set up disinfected station and lamp.
- Consult client; confirm color and check lamp compatibility.
Application Steps
- Remove previous product or polish fully.
- Push back cuticles; lightly buff nail to remove shine.
- Cleanse nail plate with dehydrator; allow to dry completely.
- Apply thin base coat; cap free edge; cure per manufacturer spec.
- Apply first color coat thin; cap edge; cure fully.
- Apply second color coat; cap edge; cure fully.
- Apply top coat; cap edge; cure fully.
- Wipe inhibition layer with IPA / gel cleanser if needed.
- Apply cuticle oil; massage into nail and surrounding skin.
Removal Steps
- Lightly file off shine on the top coat surface only.
- Saturate lint-free wipe with pure acetone; place on nail.
- Wrap each finger in foil; wait 10–15 minutes.
- Gently push off softened gel with orangewood stick.
- Do NOT scrape or force removal — re-wrap and wait if needed.
- Buff lightly; apply cuticle oil and hand lotion.
Post-Service
- Discard all single-use items; wipe station clean.
- Wipe lamp interior; disinfect all multiuse implements.
© 2026 Shear Genius Society, LTD Co. — All Rights Reserved. Unauthorized reproduction prohibited.
Nail Technology Program
Dip Powder Nails
SNS / Dip System — Station Setup & Supplies
Side A — Equipment & Supplies
Multiuse Implements — Disinfected
- Cuticle pusher (metal)
- Cuticle nipper
- Soft nail brush
- Orangewood stick
- E-file & bits (cleaned)
- Fan brush
Single-Use / Disposable
- Nail files — 180 & 220 grit
- Buffer block
- Lint-free wipes
- Gloves (latex-free)
- Disposable dip trays (pour-over)
- Tip cutter / clipper
- Nail forms or tips
- Disposable towels
Products on Cart
- Nail dehydrator
- Step 1 — Base / bond coat
- Dip powder colors (selection)
- Step 3 — Activator
- Step 4 — Top coat / sealer
- Cuticle oil
- Hand lotion
- Acetone (for removal)

Safety: NEVER double-dip brush into shared jar — pour powder over nail into disposable tray only. Activator is exothermic — apply in thin layers. Avoid all skin contact with bonding agents. Keep all lids tightly closed between uses.
© 2026 Shear Genius Society, LTD Co. — All Rights Reserved. Unauthorized reproduction prohibited.
↔ flip for back
Nail Technology Program
Dip Powder Nails
SNS / Dip System — Service Protocol
Side B — Service Steps
Pre-Service
- Sanitize hands; set up disinfected station; ensure ventilation.
- Consult client on shape, length, and color selection.
- Check for contraindications; ensure proper ventilation.
Service Steps
- Remove all old product or polish; push back cuticles.
- File and lightly buff nail plate to remove all shine.
- Apply nail dehydrator; allow to dry fully — do not touch.
- Apply Step 1 (base) to all nails — stay off the skin.
- Pour powder over nail into tray — never dip brush into jar; tap off excess.
- Repeat Steps 4–5 for 2–3 layers for desired coverage and strength.
- Apply Step 3 (activator) — thin coat; allow to harden 1–2 minutes.
- File and shape enhancement to desired form and length.
- Buff smooth; remove all dust thoroughly with clean brush.
- Apply activator (Step 3) again; allow to dry completely.
- Apply Step 4 (top coat / sealer); allow to dry fully or buff to high shine.
- Apply cuticle oil; massage hands.
Post-Service
- Educate client on maintenance and acetone soak-off removal protocol.
- Discard all trays and disposables; wipe station; disinfect all multiuse tools.
© 2026 Shear Genius Society, LTD Co. — All Rights Reserved. Unauthorized reproduction prohibited.
Nail Technology Program
Gel-X Extensions
Full Cover Gel Tips — Station Setup & Supplies
Side A — Equipment & Supplies
Multiuse Implements — Disinfected
- LED lamp (brand-compatible)
- Gel brush set
- Cuticle pusher (metal)
- Orangewood stick
- E-file & bits (cleaned)
- Tip cutter / clipper
Single-Use / Disposable
- Gel-X tip sets (pre-sized)
- Lint-free wipes
- Files — 180 & 240 grit
- Buffer block
- Gloves (latex-free)
- Disposable towels
- Foil wraps (removal)
- Cotton / saturated wipes
Products on Cart
- Nail dehydrator
- pH bond / primer
- Extend gel (adhesive)
- Gel-X tips (all sizes)
- Builder gel overlay (optional)
- Color gel (selection)
- No-wipe top gel
- Acetone (soak-off removal)

Safety: Pre-size ALL tips before service begins — incorrect fit causes lifting and nail damage. Cure times MUST match lamp wattage and brand specifications. Never force a tip. Avoid skin contact with extend gel — can cause sensitization.
© 2026 Shear Genius Society, LTD Co. — All Rights Reserved. Unauthorized reproduction prohibited.
↔ flip for back
Nail Technology Program
Gel-X Extensions
Application & Removal — Service Protocol
Side B — Service Steps
Pre-Service
- Sanitize hands; prepare station and confirm lamp compatibility.
- Size and lay out all tips in order before beginning service.
- Consult client on shape, length, and color preferences.
Application Steps
- Remove all existing product or polish completely.
- Push back and clean cuticles; lightly buff nail plate.
- Cleanse with dehydrator; apply pH bond or primer; allow to dry fully.
- Apply extend gel to inside of tip well — do NOT flood or overfill.
- Place tip at 45° to nail; slide flush to cuticle area; press firmly.
- Hold flat and cure per brand specification (typically 60 seconds).
- Repeat for all nails; check for gaps or lifting after curing.
- File and shape tips to desired length and form.
- Apply color gel in thin coats — cure fully between each layer.
- Apply no-wipe top gel; cure to finish. Apply cuticle oil.
Removal & Post-Service
- File off top gel; soak in acetone 10–15 min using foil method.
- Gently push off softened gel — do NOT peel or force.
- Buff lightly; nourish nail plate with cuticle oil and hand lotion.
- Discard all single-use items; disinfect all multiuse implements.
© 2026 Shear Genius Society, LTD Co. — All Rights Reserved. Unauthorized reproduction prohibited.
Nail Technology Program
Nail Art
Creative Design Services — Station Setup & Supplies
Side A — Equipment & Supplies
Multiuse Implements — Disinfected
- Detail / liner brushes (fine)
- Gel art brushes (flat & round)
- Dotting tools (assorted sizes)
- Striping brush
- LED lamp
- Fan brush
- Palette / glass mixing plate
- Nail drill (optional)
Single-Use / Disposable
- Lint-free wipes
- Gloves (latex-free)
- Nail foil pieces
- Stamping plates & scraper
- Makeup sponges (ombre)
- Palette paper
- Files & buffers
- Disposable towels
Products on Cart
- Gel paints — full color range
- Nail polish colors
- Cosmetic-grade acrylic paints
- Nail foils & transfers
- Rhinestones / gems (assorted)
- Stamping polish
- Gel top coat (no-wipe)
- Nail glue (gems)
- Glitter / chrome / mirror powder
- Gel cleanser / IPA 99%

Safety: Chrome and glitter dust require a mask during application. Cure ALL gel art layers between coats. Rhinestone adhesive is NOT for skin or near eyes. Use only cosmetic-grade products. Keep sharp implements away from face.
© 2026 Shear Genius Society, LTD Co. — All Rights Reserved. Unauthorized reproduction prohibited.
↔ flip for back
Nail Technology Program
Nail Art
Design Application — Service Protocol
Side B — Service Steps
Pre-Service
- Sanitize hands; prepare station and lamp.
- Confirm design concept with client — photos or mood board preferred.
- Prepare ALL tools, colors, and embellishments before starting.
Base Prep (Always First)
- Complete standard nail prep per applicable service card.
- Apply base coat appropriate to art medium; cure if gel.
- Apply background color; cure fully before layering any art.
Art Techniques
- Freehand: Detail/liner brush with gel paint; cure between layers.
- Stamping: Apply polish to plate; scrape clean; transfer to nail; seal.
- Ombre: Sponge two colors; blend while wet; cure thoroughly.
- Foil: Apply foil adhesive gel; cure; press foil; peel slowly.
- Chrome: Apply to cured no-wipe gel; rub powder; seal with top coat.
- Gems: Place on uncured top coat or nail glue; cure or press to set.
Finish & Post-Service
- Seal all art with no-wipe top coat; cure fully. Add second top coat over gems.
- Apply cuticle oil; advise client on art care and longevity.
- Clean gel brushes in IPA; cap tightly. Discard all single-use items.
© 2026 Shear Genius Society, LTD Co. — All Rights Reserved. Unauthorized reproduction prohibited.